Welcome to SurveyTester!
Now that you have registered for your SurveyTester account and have decided to check us out, please follow these steps to view and walk through the demo survey (Museums of New York).
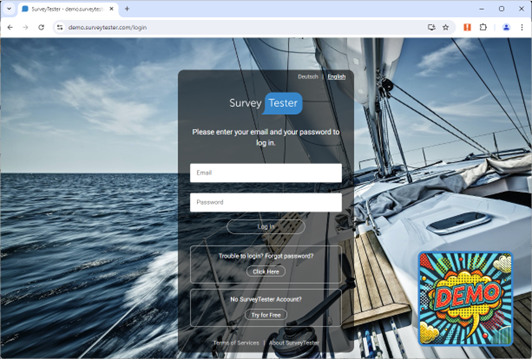
Your SurveyTester link will bring you to the SurveyTester login page where you just need to enter your credentials.
After logging in, you are presented with a list of projects you have designated as favorites. By default, you will see a project called Demo Survey. Other favorite projects will appear after you have selected them from the projects you have been assigned.
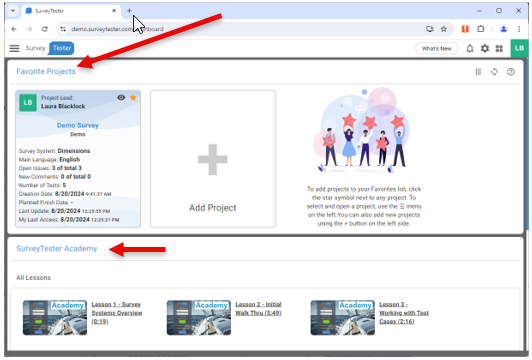
You can also access the SurveyTester Academy for a list of videos to learn more about SurveyTester.
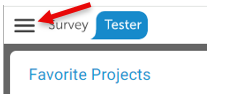
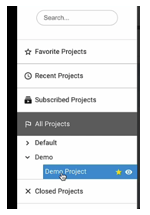
In the upper left-hand corner of the home page is the Project List icon.
Click on the Project icon to display the list of projects you have been granted access to. The projects have four categories/views: Favorite Projects, Recent Projects, Subscribed Projects, and Closed Projects. New users will find the Demo Project under All Projects > Demo.
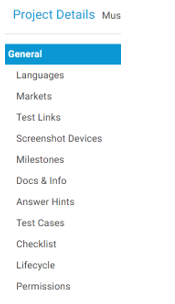
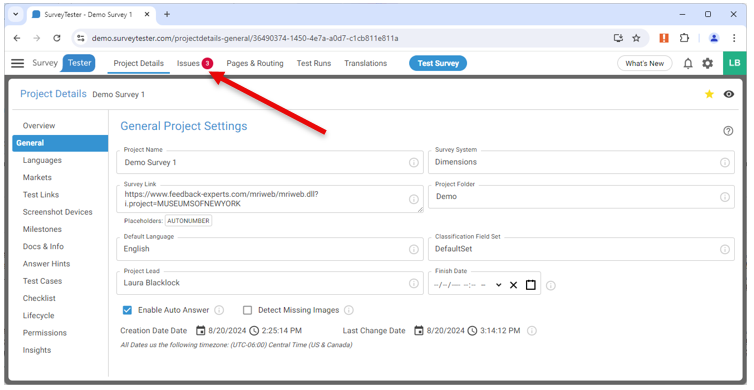
Clicking on that item will launch the Project Details page, where you can see all the project details.
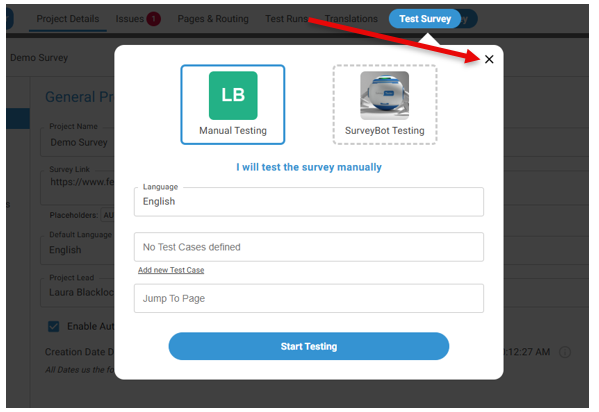
Click the blue Test Survey button to begin a test run.

SurveyTester will now prompt you to select Manual Testing or SurveyBot Testing. The Manual Test allows SurveyTester to learn about your survey question types and available answers and set up customized options for later test runs.
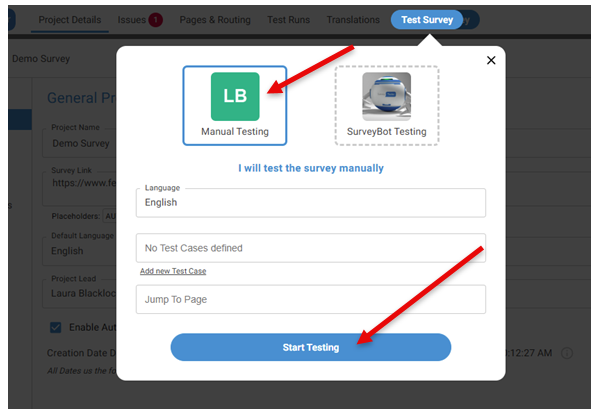
Initial test runs are usually manual; select Manual Testing and then Start Testing.
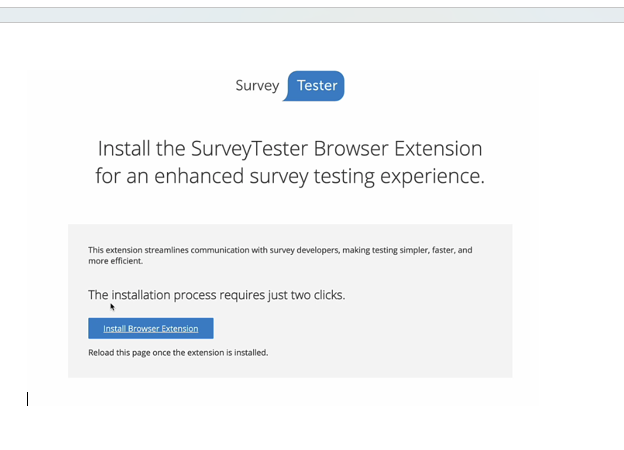
SurveyTester has a browser extension that adds major capability to the system. If this is your first time using SurveyTester, you’ll be prompted to install the SurveyTester Browser Extension for the browser in which you are active. You will only have to install it once. But there are different extensions for different browsers (Chrome, Edge).
Click the Install Browser Extension to download and start the installation process.
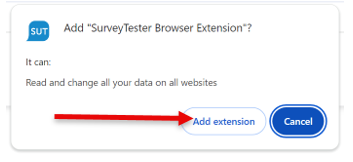
If you are running Chrome, you will see this pop-up window. Click Add to Chrome.
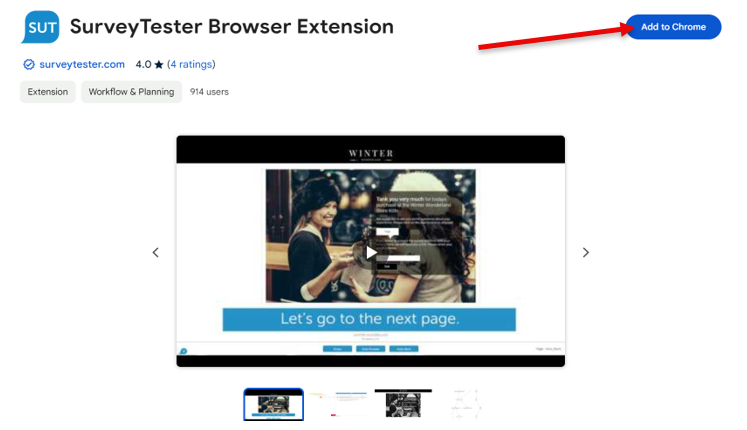
Then click on Add extension.
After installing the extension, refresh your web page (F5) to return to the SurveyTester project screen.
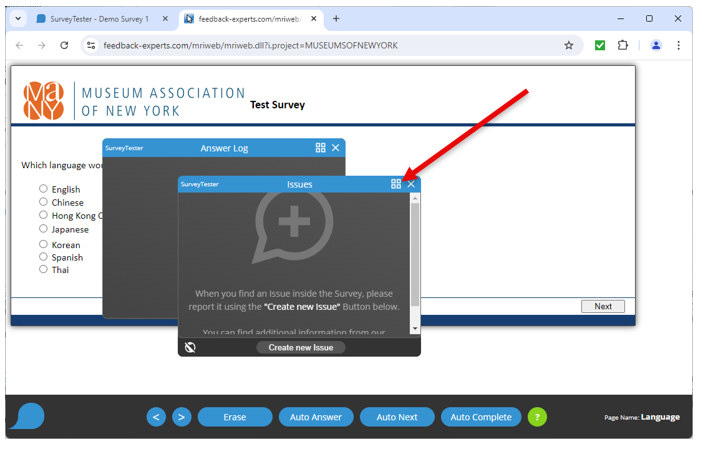
After a project is selected, and you have clicked on the Start Testing button, the actual survey appears on the screen in the white background. You might also notice two floating boxes Issues and Answer Log. Both will be useful as you walk through your survey. You can close or dock them to your ST screen by clicking on the 4 squares icon  in the top corner of each pop-up box.
The SurveyTester overlay appears in the dark gray bar at the bottom, with buttons that allow you to navigate the survey within SurveyTester.
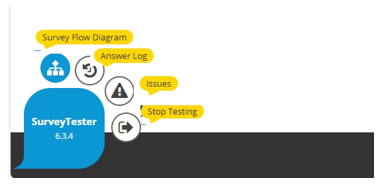
If you hover over the SurveyTester bubble on the far left, it will expand and look like this:

If you hover over any of the four icons, a text box will appear informing you of their functions. Clicking on the icon will launch the pop-up window affiliated with them. In your case, the Answer Log and Issues are probably already activated and appear docked on the right-hand side of your screen.
If you previously chose to dock the issues and answer log pop-ups, your screen will look like this. You can move and resize these boxes at any time.
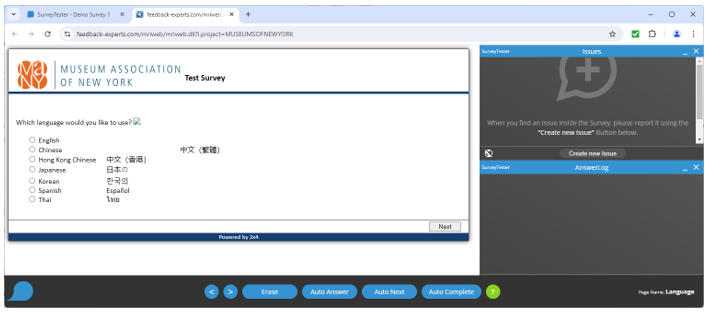
Here is a closer view of the SurveyTester buttons at the bottom of your screen.

Erase will clear any responses that have already been selected on the page.
Auto Answer will select a random response to the questions on the current survey page.
Auto Next has the same function as Auto Answer, and it also automatically forwards you to the next survey page.
Auto Complete will select random responses for each question until it completes the survey. This function allows a tester to complete a manual test run without having to click Auto Next on each page. It is the equivalent of an automatic test run, but an automatic test run that can be started at any point within the survey. Best not to use it for your very first run-through of the survey as the pages will flash by too quickly to view.
On the first screen of the survey, there is an issue that we’d like to report. The text of the Chinese language response is not aligned with the other languages.
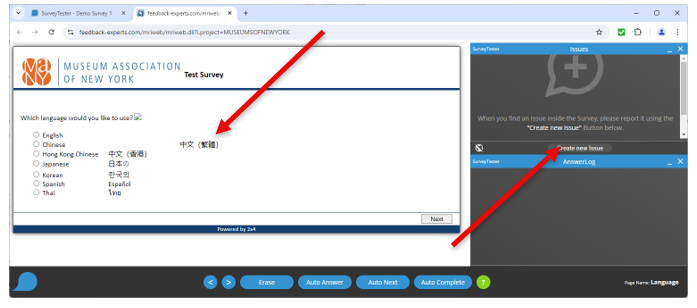
Select the Create New Issue option in the Issues box.
You can then Create an Issue that can be seen by all your colleagues.
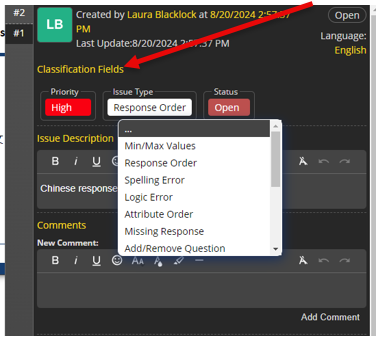
The number and content of all classification items are under your control. The system allows each company to create its own unique classification sets.
In the Classification Fields section of the form, choose the appropriate value for the classification fields assigned to your account.
Next, draw a marker around the issue to highlight it. The screen is locked until you finish creating the issue. Grab the marker from the row of colors and drag it onto your survey. SurveyTester will not allow you to navigate from an issue until you have saved it. Now select the green Save New Issue button.

After you have saved that Issue, manually select “English” as your response to the first question about language. This will keep the survey in English as you continue through your test run.
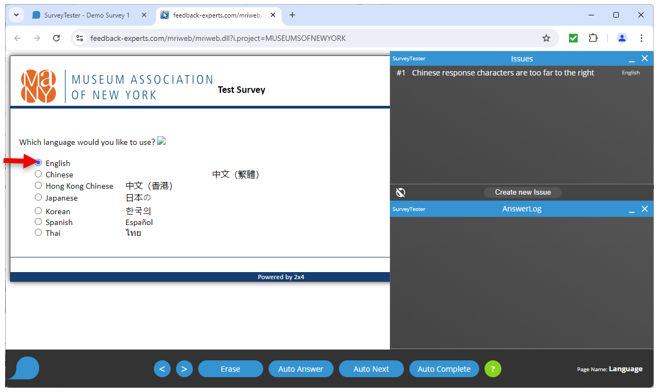
Move through the survey using the Auto Answer button or the Auto Next button.

Those options will allow you to review the survey pages and see how answers are selected. SurveyTester will select random responses and learn about your survey in the process. If you see any other Issues in the survey, feel free to report them!
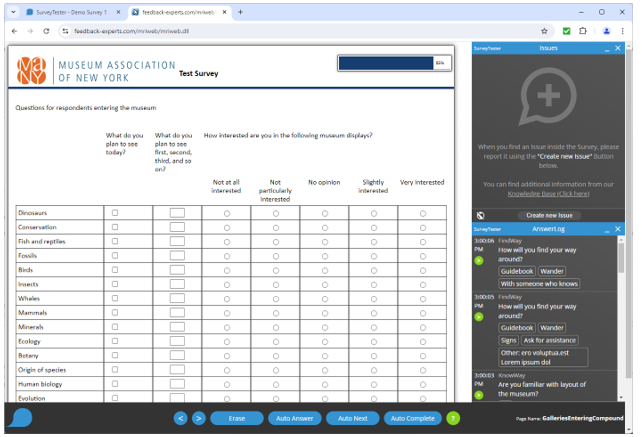
While moving through the survey, you might get to a page with a large grid. The Auto Answer function is a fantastic time-saver feature on pages like this.
If you select Auto Answer to have SurveyTester select the responses for this grid, you might see a survey error messages like the ones seen in the screen below. In this example, SurveyTester was not aware that the text box question only allowed numeric responses.
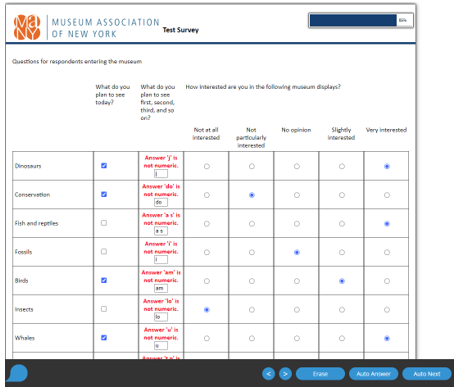
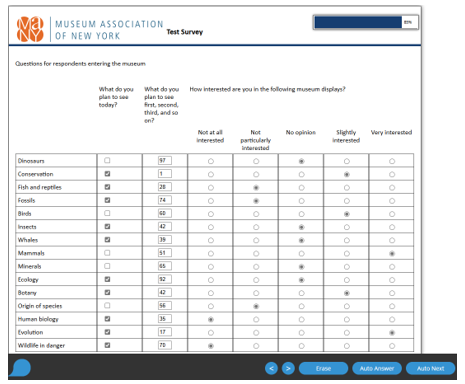
If you click the Auto Answer button again, SurveyTester will have learned from the error message, in red, and replace the random letters response with a numeric response. In all future test runs, SurveyTester will know to only enter numeric responses in those response items.
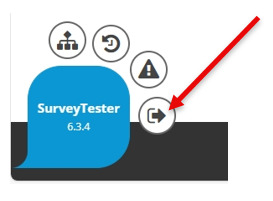
When you reach the end of the survey, go to the SurveyTester bubble and select the Stop Testing (exit button) item.
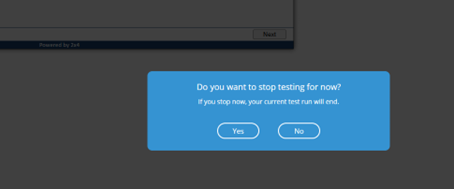
A pop-up will then appear, click on Yes to end the test run.
You will then see the next screen. Click on the X to close the window or click in the gray area to do the same.
You are then taken back to the Project Details screen...
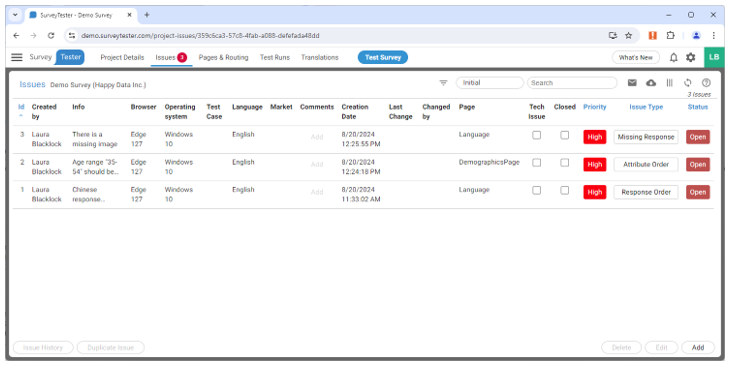
To view the list of the issues that have been reported, Click on the Issues menu item.
You will then be presented with a form containing all reported issues.
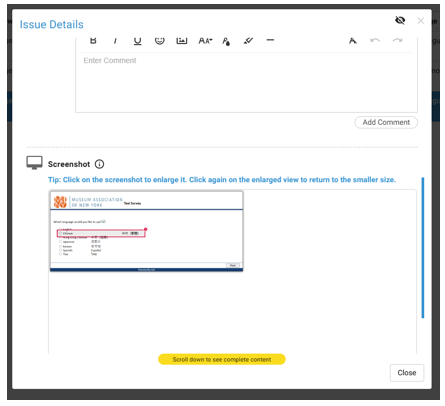
Double-click on any issue to see the details.
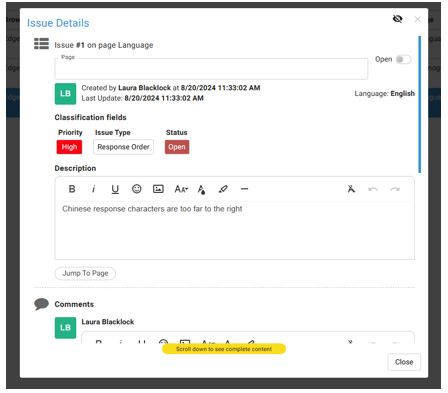
Scroll down, and you can see the screenshot that was automatically created.
That is how you run through the SurveyTester demo survey and create Issues!!
Be sure to click on all the menu items to view pages and routing, test runs, translations, and many more fantastic features in Survey Tester.